

 USD
 USD
 Canadian

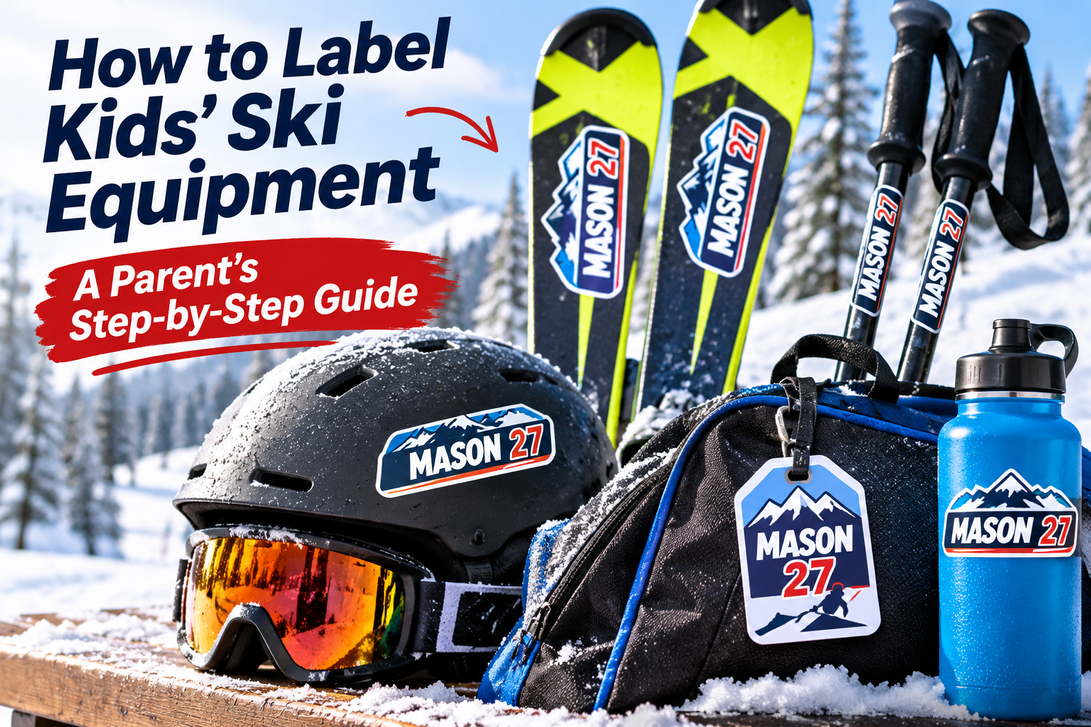
How to Label Kids' Ski Equipment: A Parent's Step-by-Step Guide
Getting kids ready for a day on the slopes is practically a sport of its own. Between finding matching gloves, packing snacks, adjusting boots, and loading skis into the vehicle, there's plenty to remember.
But there's one small job that can save parents a lot of frustration: labeling your child's ski equipment before heading to the mountain.
At ski school, rental areas, and crowded mountain lodges, kids' equipment can look remarkably similar. One misplaced pole or mixed-up helmet can turn a great ski day into an unexpected visit to lost and found.
In this guide, we'll walk through exactly how to label kids' skis, poles, helmets, water bottles, and ski bags, including where to place labels and how to help them stay attached through the winter.
Step 1: Gather Everything Your Child Takes Skiing
Before you start labeling, lay out your child's ski equipment in one place.
Here's a simple checklist:
-
Left and right skis
-
Both ski poles
-
Ski helmet
-
Goggles case
-
Water bottle
-
Ski boot bag
-
Ski backpack or equipment bag
-
Lunch container
You don't necessarily need a label on every single item, but anything that could be left behind, mixed up, or placed in a shared storage area deserves consideration.
Parent tip: If your child attends ski school, ask the instructor which items most frequently end up in lost and found.
Step 2: Choose a Consistent Name Format
Before applying anything, decide how you want your child's name to appear.
For example:
MASON R.
Using the same name across all equipment makes it easier for instructors, coaches, and other parents to identify belongings.
For younger children, consider adding a recognizable color or design. A child who cannot easily read their full name may still recognize their bright blue or orange sticker.
If you have multiple children, assign each one a different color combination.
This makes sorting equipment at home easier, too.
Step 3: Label Both Skis in the Right Location
Skis are one of the most important pieces of equipment to identify, especially when dozens of similar pairs are leaning against the same rack.
Where to place the label:
-
Find a smooth, flat area on the top surface of each ski.
-
Choose a location that's easy to see when the skis are resting in a rack.
-
Keep the label clear of bindings, moving components, and areas where ski boots make frequent contact.
-
Apply the same name to both skis.
Avoid placing stickers on the bottom of the ski. The base is designed for gliding on snow and requires regular maintenance.
A personalized name label on each ski makes it easier to identify a matching pair when equipment gets separated.
For families looking for labels designed for winter sports, Stinky Lockers offers personalized ski stickers for skis, poles, helmets, and water bottles.
Step 4: Add Name Labels to Ski Poles
Ski poles can be particularly easy to mix up because many children's poles look almost identical.
The best location for a name label is usually on a smooth section of the upper pole shaft, where it won't interfere with the grip or strap.
How to label ski poles:
-
Wipe the shaft clean.
-
Make sure the surface is completely dry.
-
Position a narrow name label on the upper shaft.
-
Press firmly along the entire sticker.
-
Repeat on the second pole.
Avoid placing labels near moving or adjustable mechanisms.
If your child has adjustable poles, make sure the label doesn't interfere with the adjustment system.
Step 5: Identify Helmets Without Covering Safety Information
Helmets are another common source of confusion during ski lessons and group activities.
Before adding a sticker, check the helmet manufacturer's instructions. Some manufacturers restrict adhesives or modifications to the helmet shell.
If the manufacturer permits stickers, choose a smooth, visible location that doesn't cover:
-
Ventilation openings
-
Safety certification labels
-
Manufacturer information
-
Adjustment mechanisms
-
Existing damage or cracks
If stickers aren't permitted, consider labeling the helmet bag or another approved accessory instead.
Important: Never compromise helmet safety just to make equipment easier to identify.
Step 6: Label Water Bottles, Boot Bags, and Backpacks
These smaller items are often the easiest to forget.
Water bottles get left beside benches. Boot bags end up in piles. Backpacks can look nearly identical when an entire ski school group arrives wearing similar gear.
For water bottles, choose a smooth surface away from heavily textured areas.
For boot bags and backpacks, consider a visible luggage-style identification tag or a suitable label on a smooth section.
You can also use a personalized sports bag tag to help identify bags at ski school, during travel, or at weekend competitions.
Privacy tip: A child's name is usually sufficient on visible equipment. If you want to include a parent's phone number, consider placing that information on a bag tag or inside the bag rather than prominently displaying it on every item.
Step 7: Prepare the Surface Before Applying Stickers
Even a well-made sticker can struggle to stay attached if the surface is dirty, wet, or oily.
For the best results:
-
Bring the equipment indoors and let it reach room temperature.
-
Clean the area according to the equipment manufacturer's instructions.
-
Allow the surface to dry completely.
-
Position the sticker carefully before pressing it down.
-
Press firmly from the center toward the edges to help remove trapped air.
-
Follow the sticker manufacturer's recommended application and curing time.
Avoid applying stickers outdoors in freezing temperatures unless the manufacturer specifically recommends doing so.
Parent tip: Label ski equipment at home the evening before your trip rather than rushing through it in a snowy parking lot.
Step 8: Check Your Labels Throughout the Ski Season
Ski equipment takes a beating.
Between cold temperatures, wet snow, vehicle racks, equipment bags, and regular handling, labels can experience considerable wear.
Every few ski outings, take a quick look at the labels.
Check that:
-
Names are still easy to read.
-
Corners haven't started lifting.
-
Labels aren't interfering with equipment.
-
Both skis and poles are still identified.
-
Bags and water bottles haven't lost their identification.
Replace any damaged or unreadable labels before the next ski trip.
This quick inspection takes less time than searching for a missing piece of equipment after lessons.
A Simple Ski Equipment Labeling Checklist
Before your family leaves for the mountain, run through this final check.
| Equipment | Best labeling location |
|---|---|
| Skis | Smooth top surface of each ski |
| Ski poles | Upper shaft, away from grip and adjustments |
| Helmet | Manufacturer-approved location or helmet bag |
| Goggles | Protective goggles case |
| Water bottle | Smooth exterior surface |
| Boot bag | Visible bag tag or suitable flat area |
| Ski backpack | Bag tag or identification panel |
| Lunch container | Smooth exterior surface |
You can save this checklist for the beginning of each ski season or share it with other parents in your child's ski school group.
Frequently Asked Questions About Labeling Ski Equipment
What's the best way to put a name on kids' skis?
A clearly readable name label placed on the top surface of each ski is a practical option. Choose a smooth location away from bindings and areas exposed to heavy abrasion.
Can I use a permanent marker on ski equipment?
Permanent markers may work on some surfaces, but writing can become difficult to read or wear away over time. Test compatibility before marking expensive equipment. A removable identification label may be preferable.
Should I label rental skis?
Always ask the rental shop before attaching stickers or writing on rental equipment. Many rental companies already use their own identification systems.
For rented equipment, consider labeling personal accessories such as water bottles, bags, and goggles cases instead.
Can waterproof stickers stay on ski equipment?
Waterproof labels intended for outdoor equipment can withstand regular moisture exposure when applied correctly to compatible surfaces. Clean preparation, suitable materials, and proper application temperatures are important.
How can I help my child recognize their equipment?
Use a consistent name format, bold lettering, and a recognizable color or design. For younger children, a distinctive color combination can make identification easier.
Make Ski Days Easier With Clearly Labeled Equipment
A successful family ski day starts long before the chairlift.
Taking a few minutes to label skis, poles, bags, and accessories can help reduce equipment mix-ups and make busy mornings at the mountain a little easier.
It's a small preparation step that can save time throughout the season.
Ready to get your young skier's equipment organized?
Explore Stinky Lockers Personalized Ski Stickers and create name labels for your child's winter sports gear.
Less time searching for equipment. More time enjoying the slopes.
Keep Their Ski Gear Out of Lost & Found!
Give your young skier personalized waterproof ski stickers featuring their name and favorite colors. An easy way to identify skis and equipment at the hill.
